Introduction
The Actual ODBC Drivers provide three core features for connecting an ODBC-ready application such as Microsoft Excel and FileMaker Pro to a database:
- the setup utility that allows you to specify the connection name and the name or address of the server hosting the database
- a login screen that authenticates you to the database
- the driver itself, which communicates over the network with the database.
Two of the most popular ODBC-enabled applications on the Mac are Microsoft Excel and FileMaker Pro. The steps for connecting from these applications are described here.
Configuring a Data Source Name (DSN)
In order to connect to the database from an application such as Microsoft Excel, you must first create a DSN, which specifies the address of the server and the name of the database to which you will connect.
Note: In the following instructions, the "Administrator" refers to the application used to configure your DSN:
- We suggest using the ODBC Manager application in the /Applications/Utilities folder
Here's what you do to configure a DSN:
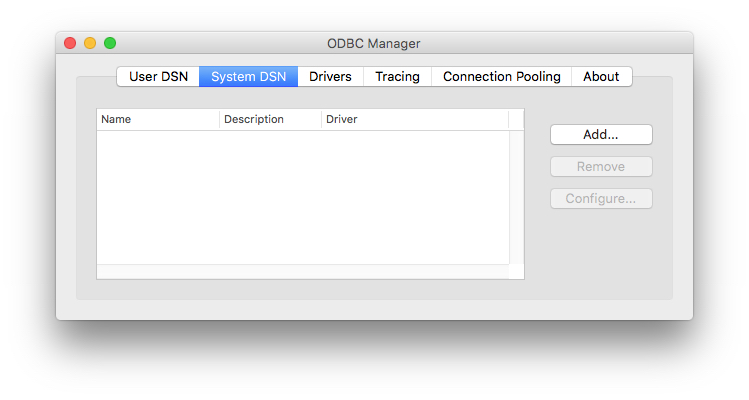
- From the Utilities folder in the Applications folder, launch ODBC Manager
- When the Administrator window appears, press the Add button to create a new System DSN.
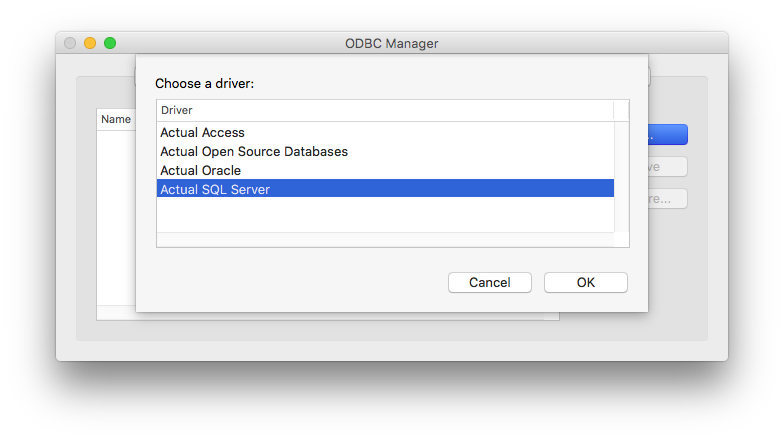
- Select the driver required for your database from the list and press Finish.
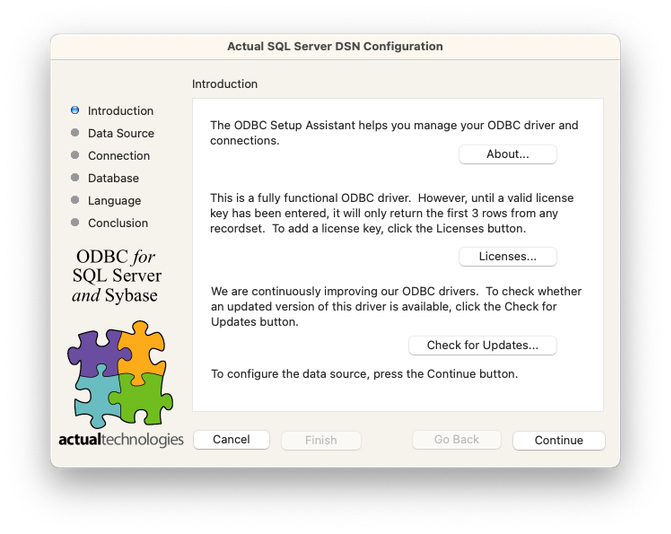
- Press the Continue button to advance to the Data Source panel.
- Enter the name of the DSN (name it whatever you like - most people just use the name of the database).
- Press the Choose button to select your file (an Access database should have a ".mdb" or ".accdb" extension, an Excel spreadsheet should end with ".xls", and a text file should end with ".csv or ".txt")
- Select the "SQLite" radio button and press Continue
- Press the Choose button to select your file (for example, /Users/
/Library/Mail/Envelope Index) - Enter the IP address of your server. The Actual ODBC Driver remembers the 5 most recent server names you enter, so you may also select from the list if you have configured other connections.
- Press the Continue button to advance to the Connection panel.
- Click the "Connect to server" checkbox and enter your database login ID and password.
- Press the Continue button to advance to the Database panel.
- Select your database from the list or enter its name manually.
- Press the Finish button to advance to the Conclusion panel.
- To test your connection, press the Test button, and enter your user ID and password when prompted.
- Press Done to save the new DSN.
- Exit the Administrator application
For Access databases, Excel spreadsheets and text files:
For SQLite:
For all other databases:
For SQL Server and Sybase:
For all databases:
You are now ready to connect to your database using your application.
Using Microsoft Excel
Microsoft Excel includes the Microsoft Query application in the default installation. MS Query is needed to construct the queries that will return data from your database to Excel. More information is available on our Excel resource center.
When you are ready to import information into Excel from your database, perform the following steps:
- Select Data -> Get Data -> From Database (Microsoft Query) from the Excel menu.
- When you see the iODBC Data Source Chooser dialog, select the data source you created in the previous steps and press the OK button.
- At the login prompt, enter your database login ID and password and press OK.
- MS Excel will automatically launch MS Query. Use MS Query to construct a SQL statement that will be used to return data to your Excel spreadsheet.
Using FileMaker Pro
You can use FileMaker Pro to create reports generated from database that has been imported into your FileMaker database. Advanced FileMaker users can also write FileMaker scripts which add or update data in your database.
FileMaker includes support for “External SQL Sources” (ESS) which allow you to work with a Microsoft SQL Server, Oracle or MySQL database as if it were a FileMaker database. There is more information about this powerful feature at our FileMaker resource center.
You can import data from database into FileMaker by performing the following steps:
- In FileMaker Pro, select the following menu item: File -> Import Records -> ODBC Data Source...
- Select the name of your data source (created in the above section) from the "Select ODBC Data Source" dialog and press Continue.
- Enter your database login ID and password and press OK.
- Use the "SQL Query Builder" dialog to construct a SQL statement that will be used to return data to your FileMaker database. When you are finished, press Execute.
- Use the "Import Field Mapping" dialog to map fields in your query to fields returned by your FileMaker database. You can drag the fields listed for your FileMaker database to change the mapping to the corresponding query result fields. When you are finished, press Import.
- When the "Import Options" dialog is displayed, press the Import button.
Notes:
- The default installation of the Actual ODBC Driver provides for an unlimited use evaluation license. Until a license key has been entered, the driver will only return the first 3 rows from each recordset. If you need an alternate evaluation arrangement, please contact us at orders@actualtech.com.
- Once you have purchased a license key (either from our website or through other arrangements), you must enter the key into the driver. You may do this by pressing the "Licenses..." button on the Introduction panel described of the DSN setup assistant. Copy the 20 digit license key from your e-mail receipt and paste into the License Key field and press OK.
- We will be releasing periodic updates to the driver. These updates will consist of any required bug fixes, in addition to minor feature enhancements. You should check to see if updates are available by visiting our website. You can also press the Check for Updates button on the Introduction page described in the step above.