Introduction
Microsoft Word for the Mac includes the ability to perform a mail merge (also known as a data merge). A mail merge is basically a form letter, with place holders for specific data such as name and address. When you perform a merge, one copy of the form letter is produced for each record in a designated data source, with the place holders replaced with the appropriate fields from the data source.
Unlike Word for Windows, the Mac version of Word does not support ODBC as a data source. However, it does support Excel as a data source, and Excel supports ODBC. Therefore, we can use Excel as an intermediary between the ODBC source and MS Word.
These instructions assume you have already downloaded and installed the appropriate ODBC driver for your database and you have configured a DSN (data source name). If you have not yet purchased a license key, you will only see the first 3 rows from any database query.
Please contact us at support@actualtech.com if you have any questions or suggestions regarding these instructions.
Create an Excel spreadsheet with your ODBC data
Let's assume that you will be creating a form letter to a list of customers. All the customer information resides in your sales database, which we will connect to using the ODBC connectivity of MS Excel.
For this example, we will be using the NorthWind example database, which includes a "Customers" table. Your database will probably have a similar table. See this article for step-by-step instructions for connecting to your database and specifying your query:
To summarize, here are the steps you'll need to follow to import your customer information into Excel:
- Create a new Excel spreadsheet
- Select Data->Get External Data->New Database Query...
- Select your DSN from the iODBC Data Source Chooser dialog and press OK
- Enter your User ID and Password information (if needed)
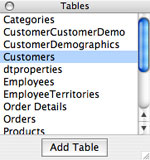
Once you are in Microsoft Query, select your Customer table and press Add Table:
Select the fields you want to use in your form letter, such as name, address, etc by double clicking on the field name within the table:
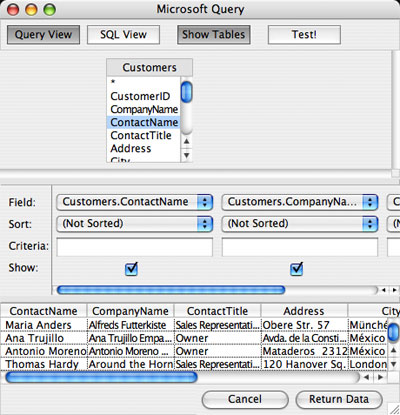
When you have selected your fields, you can preview the results by pressing the "Test!" button. When you are satisfied with the results, press the "Return Data" button in the lower right corner to return to your spreadsheet.
Excel will then prompt us for the location to place the results:
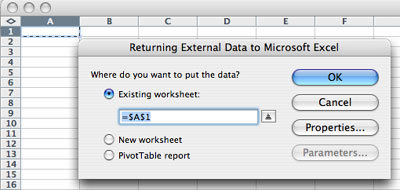
We'll just accept the default and press OK. The results are then imported into the spreadsheet:

Now save your spreadsheet file. You can update your spreadsheet any time with the latest information from your database by right clicking (control clicking) on your results within the spreadsheet and selecting "Refresh Data" from the menu.
Create your form letter in Word
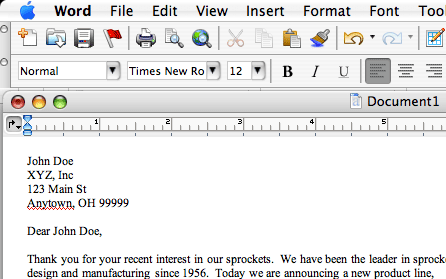
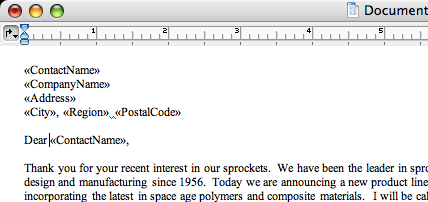
Using Word, create a new document. Write the text of your form letter, using hypothetical data as temporary place holders:
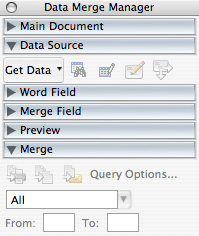
Now select the Tools->Data Merge Manager menu to display the Merge Manager:
First, expand the Main Document triangle, click on the Create popup button, and select "Form Letters" from the popup menu.
Expand the Data Source triangle, click on the Get Data popup button, and select Open Data Source... from the popup menu to display a dialog for selecting your Excel spreadsheet containing your customer data.
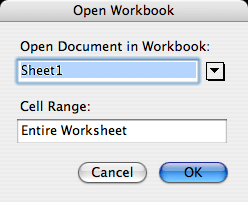
Select your spreadsheet file and press Open. You will then see a dialog for selecting the sheet and data range:
For this example, just accept the defaults and press OK. The Data Merge Manager will be updated to display the fields defined in your spreadsheet under the "Merge Field" heading.
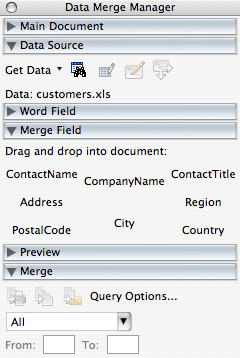
Now drag these fields onto your form letter document, replacing the hypothetical place holder text you entered earlier:
When you are ready to create your merged document,
click on the "Merge to New Document" button  under the Merge section:

A document will be created with the form letter populated with the data from your spreadsheet. For each row in the spreadsheet, the form letter populated with the fields from that record will appear in a separate section (page) of the document.
For more information
To learn more about MS Office database connectivity, please visit our MS Office Resource Center.

